|
Note: We recommend a minimum of 6" on each side of the seam - allowing ample
amount of gluing surface.
|
|
Click on Drawings To Enlarge
|
|
|

|
By laying out your design on paper you
will get a rough idea of the materials you will need. This
example shows that there will be a 2ft. fringe on three
sides and a 3ft. fringe on the bottom side.
|
|
|
|
|

|
Use a piece of yellow or white chalk to
draw out your design on the putting green
material. We suggest that you make this decision with all
parties involved prior to cutting the material.
(Professional installers might need their clients present
during this process.)
|
|
|
|
|

|
Insert 16d penny box nails 6" to 8"
apart. Push them through the material exposing the point
on the backside (see photo below). Rollback the putting
green surface exposing the nail holes. You can take a red
sharpie and transfer the design that is on the
surface to the back of the material or just cut along the
nail holes using them as a guide.
Remember to use
a sharp utility knife to cut out your pattern.
Change out your blades
frequently.
|
|
|
|
|

|
Layout your rough cut fringe pieces
around the entire putting green. Adjust accordingly to
allow room for trimming.
|
|
|
|
|

|
If you have small
area like a corner that barely reaches we recommend that you
cut a larger piece (12"X12") and place it in that area.
(see red square)
|
|
|
|
|

|
Using nails to hold the pieces in place
on the entire perimeter (12" on center). NOTE: You
will be pulling them back out and resetting them while you
sand and brush the area.
|
|
|
|
|

|
Carefully pull back the putting green
surface allowing your fringe material to fall below the
putting green surface. Get the entire putting green
surface on top of all fringe pieces.
Use the
putting green edge as a guide and stick 16d penny box
nails 6" to 8" apart through the fringe material.
Fold back the putting green surface in the area that you
are working on. Then flip the fringe material over exposing
the nails holes. Using nail holes as a guide cut all fringe
material.
|
|
|
|
|

|
Last step is to glue all seams with an
exterior turf adhesive. (see below)
NOTE: You can nail these areas down
temporarily while the glue cures. After a clue has cured -
remove the nails.
See
Turf Adhesive
Instuctions below...
|
|
|
|
 |
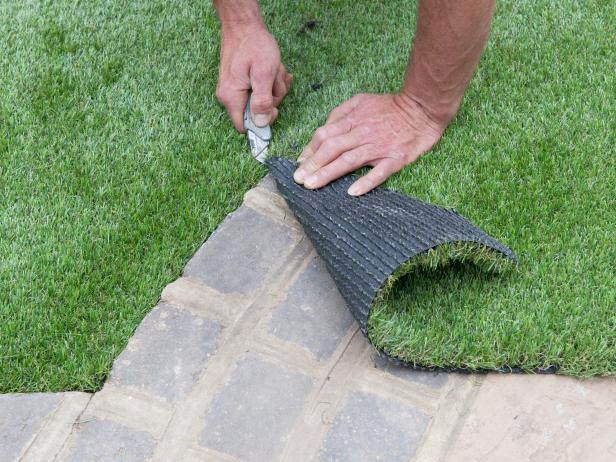
This photo is to simply to show you the process of taking a nail
and poking holes at the edge of the putting green through the
fringe turf. After you complete this process you will
slide the piece of fringe back out from under the putting
green. Roll it over and cut along the nails holes -
transferring the curved line perfectly. |
 |
Build a concrete foundation up halfway (2.5" to 3") around
the bottom of the cup. Making sure not to get any concrete
under the cup. |
 |
Note: Put drain rock under cups or you can French drain as well. Do not get concrete under cups.
Place your ready mix around the lower 1/2 of the cup as a concrete footer. |
 |
Continue to change out your blade often and use the edging
to cut against. |
|
|
|
|
|


 Login Status